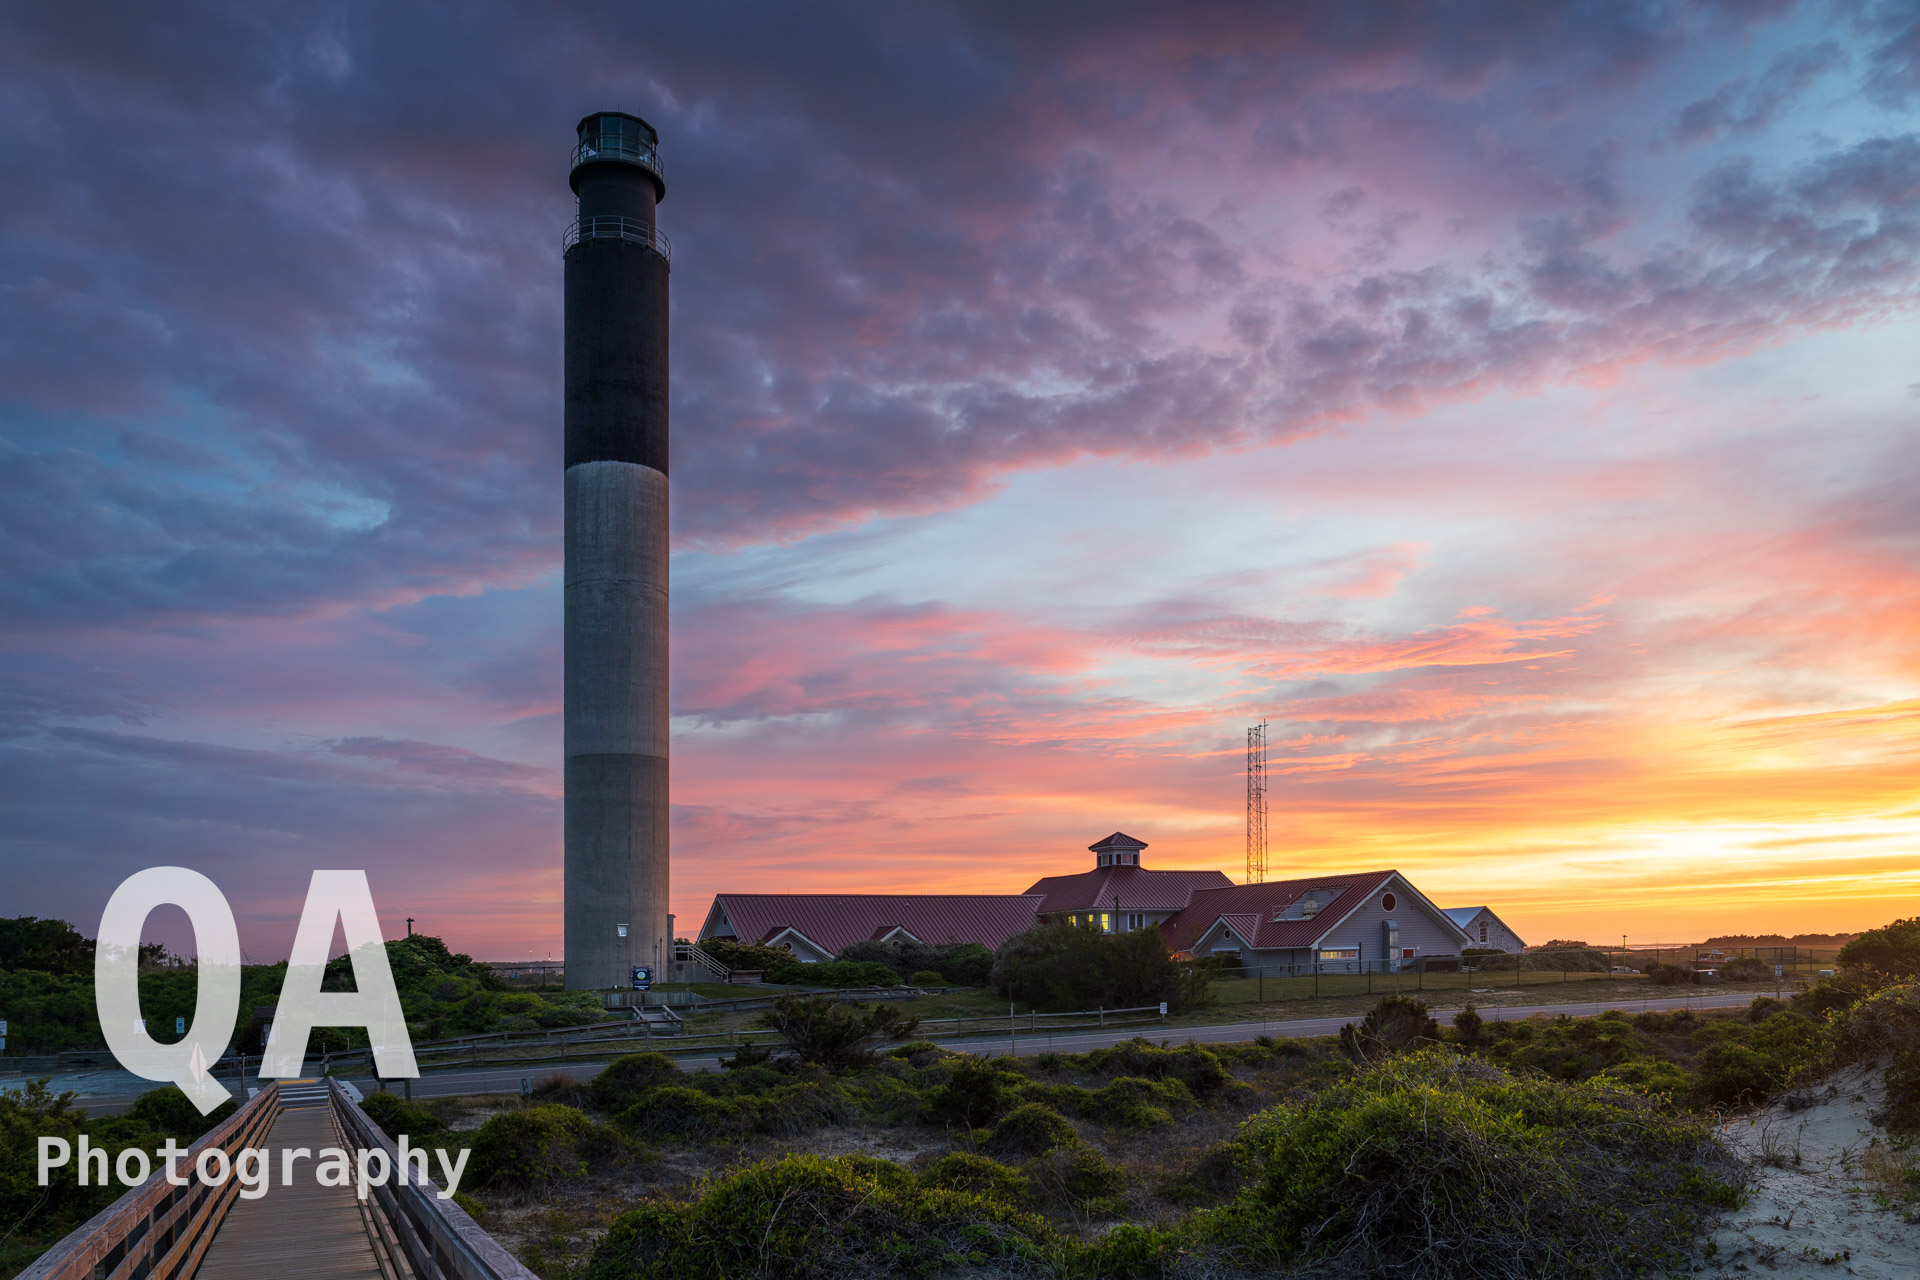
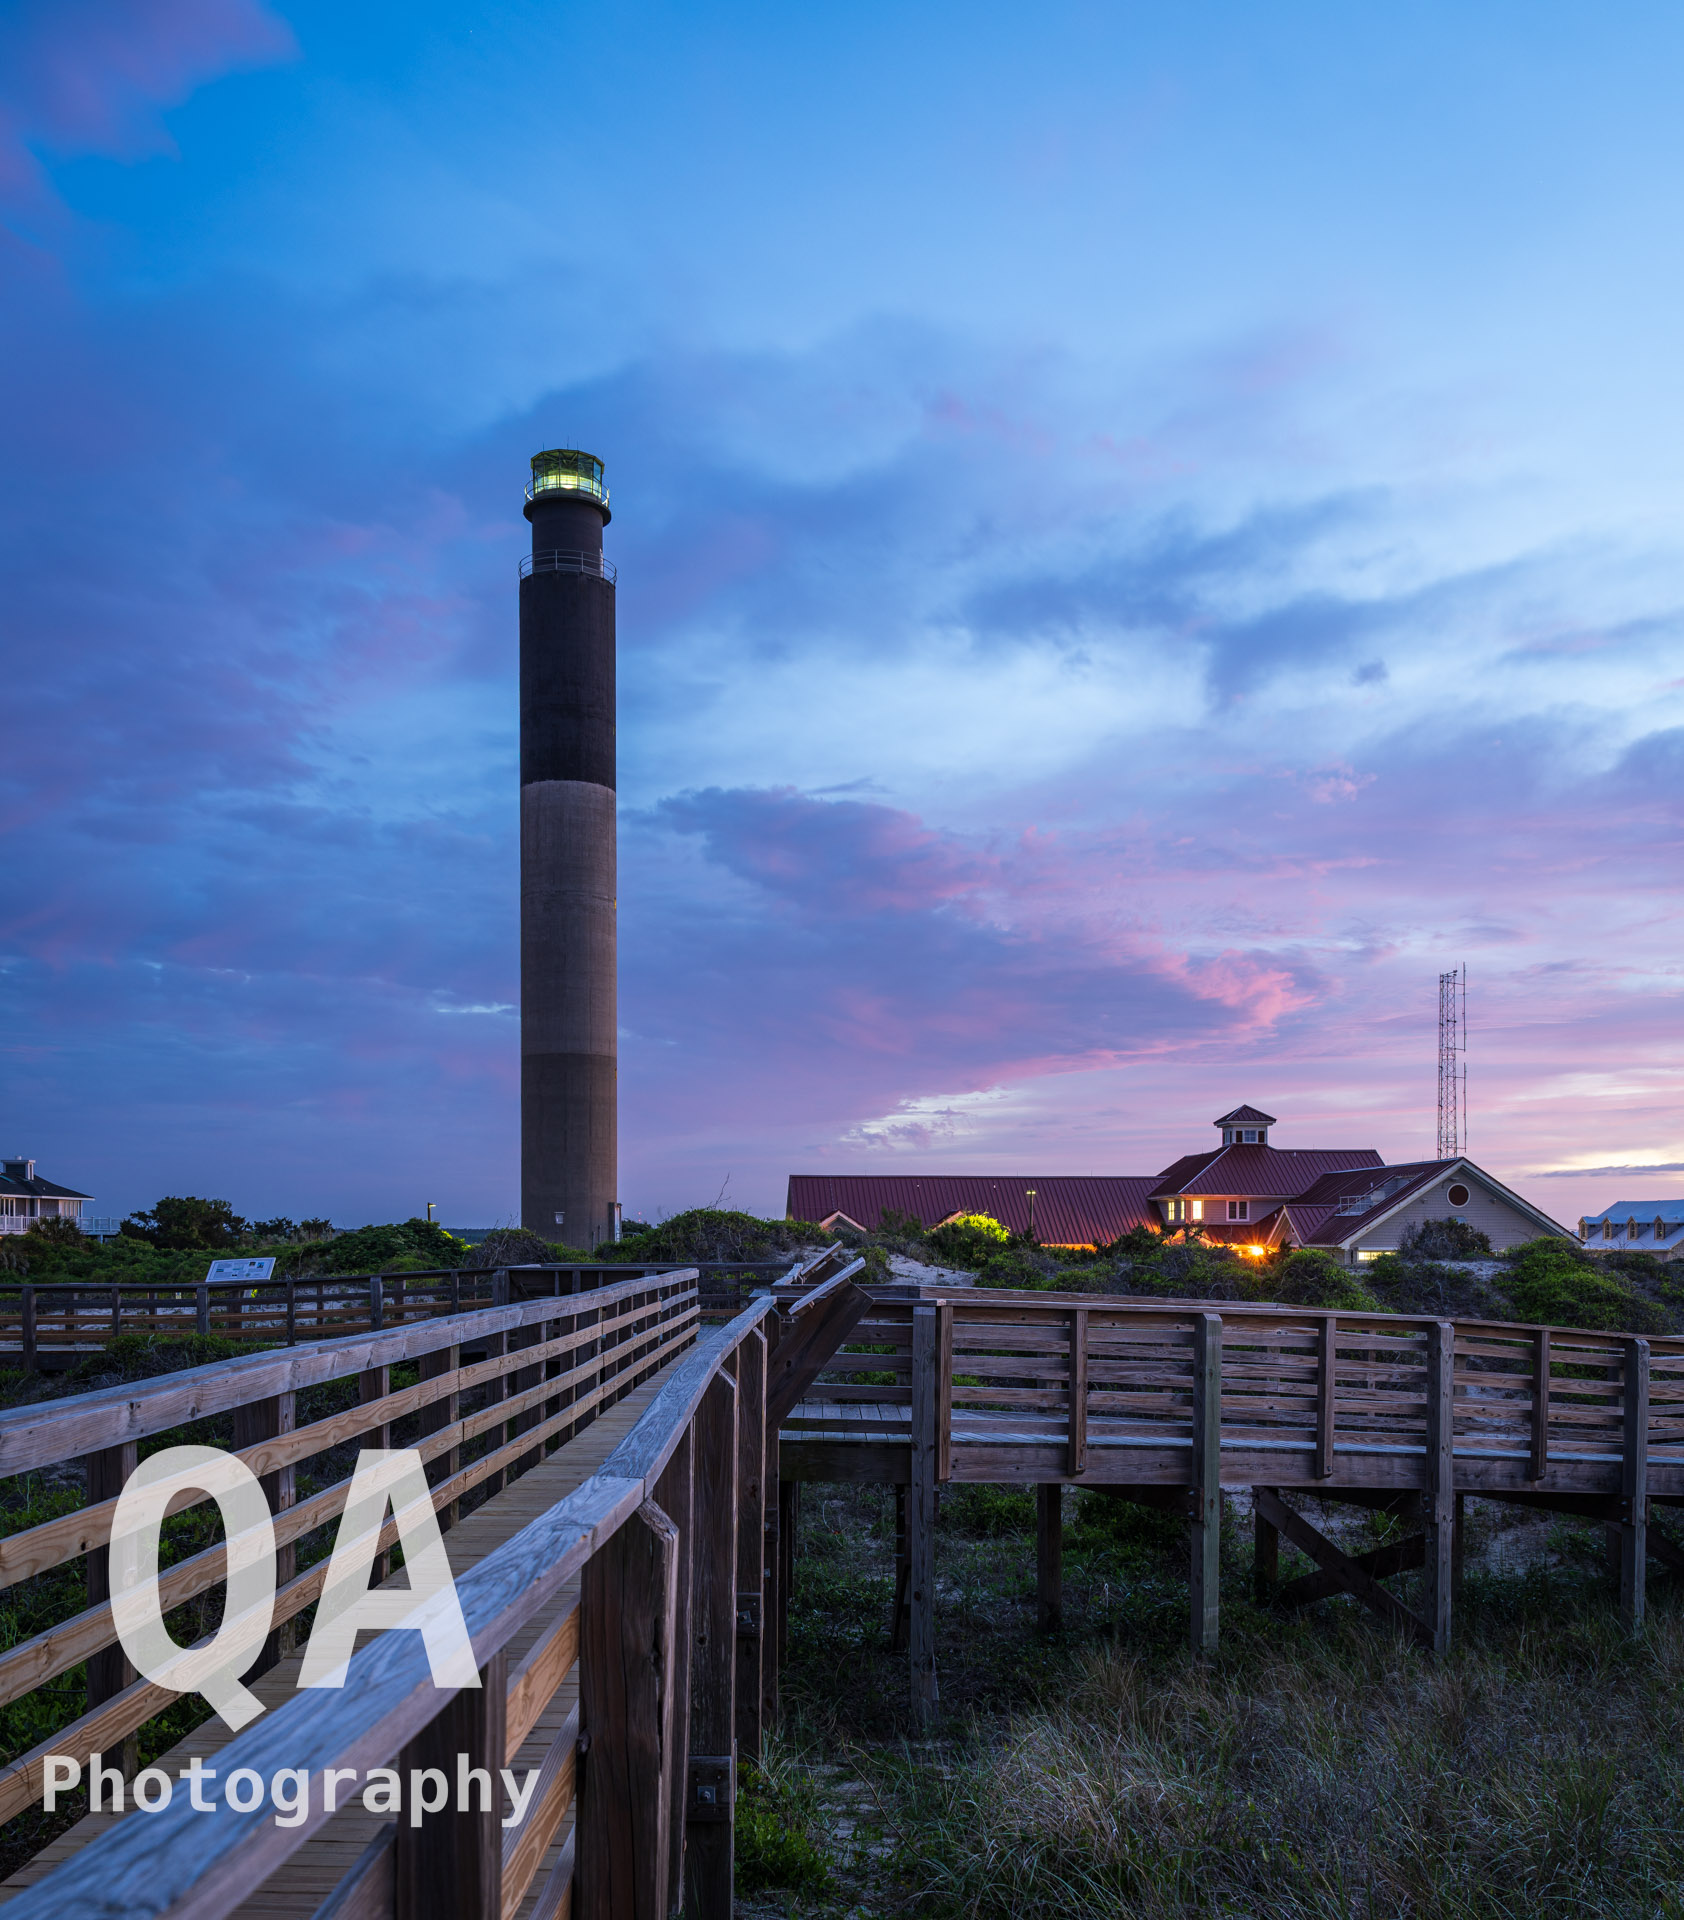
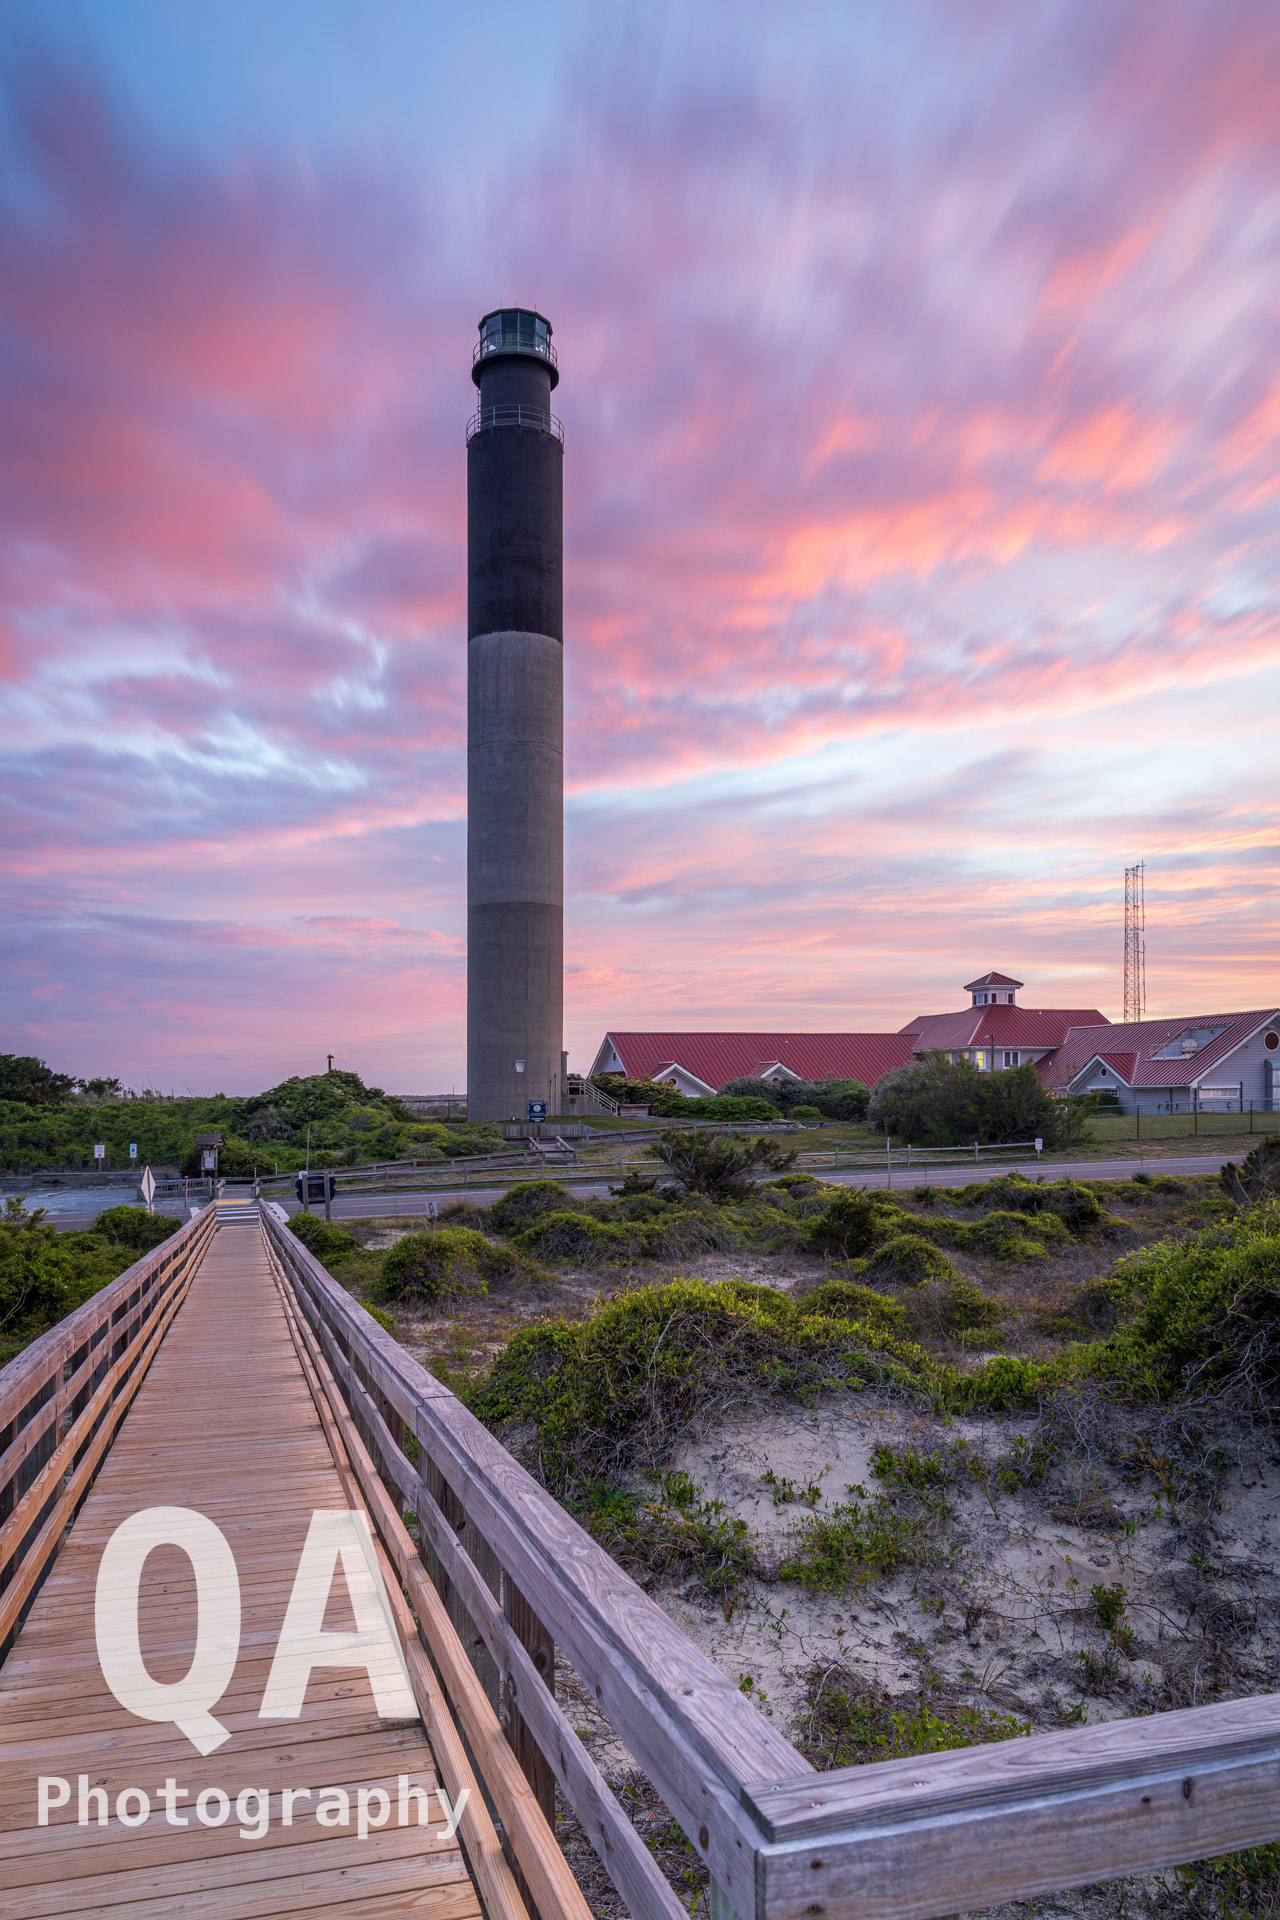
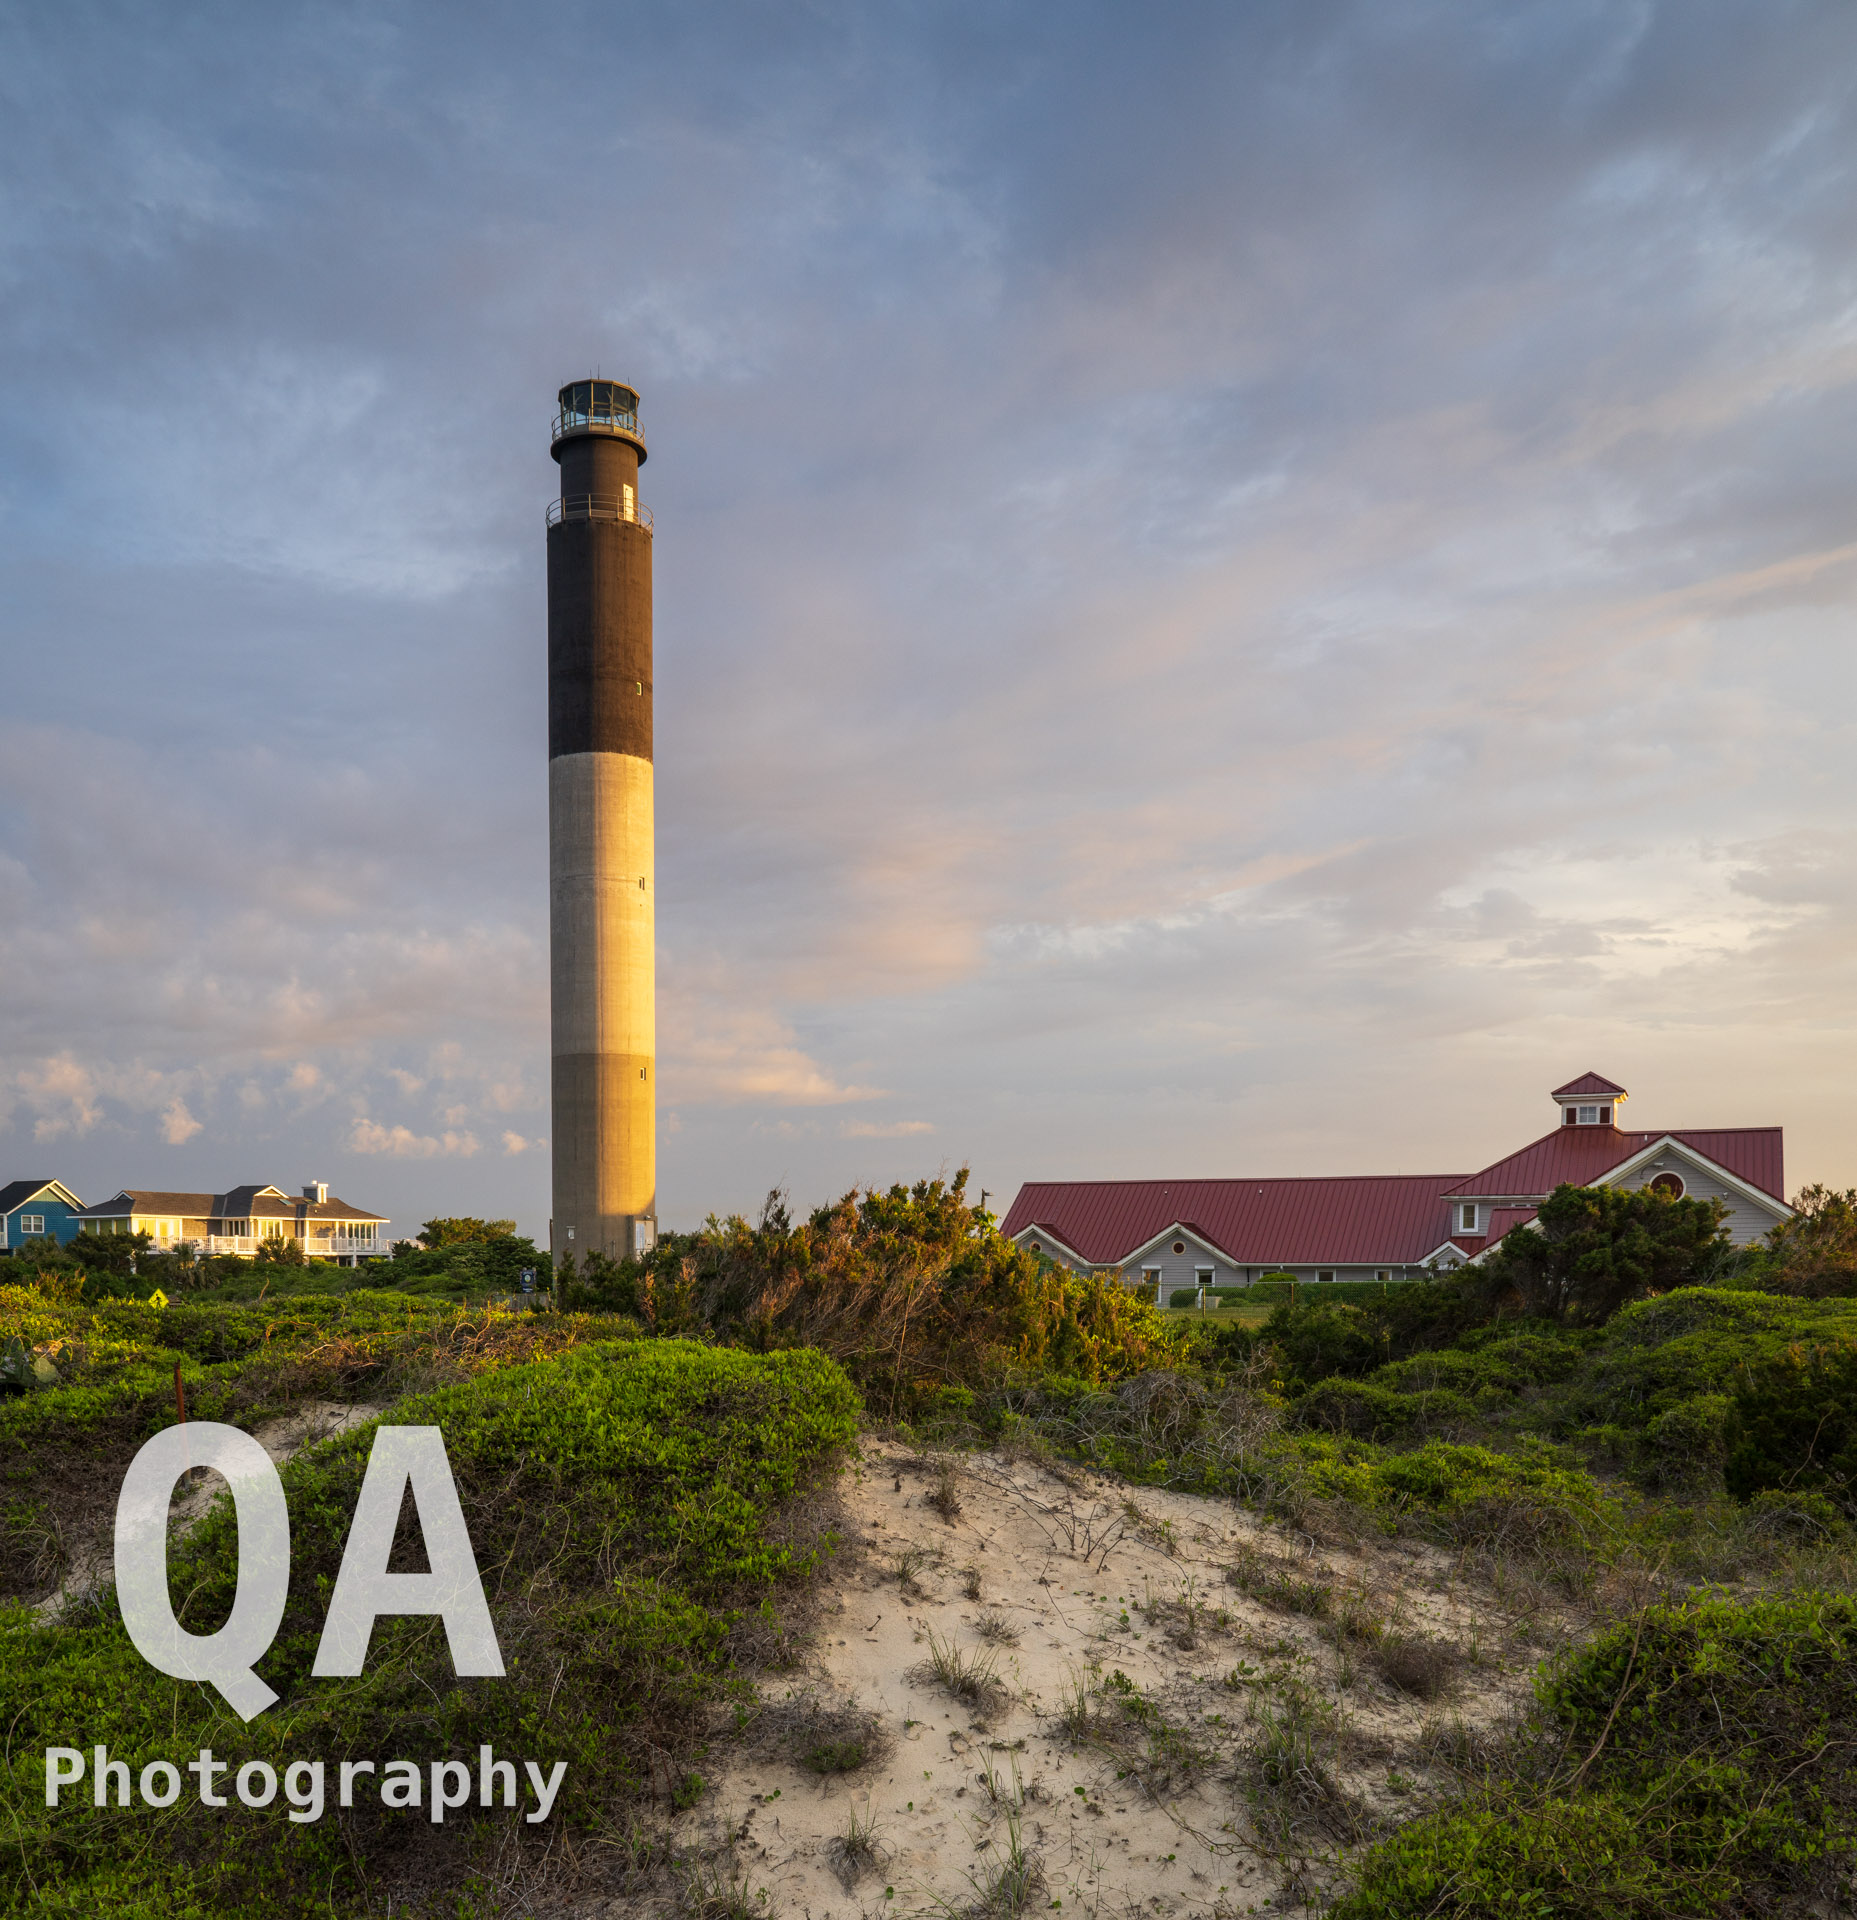
I recently traveled to North Carolina. This was a voluntold type trip in that I was only there because my SO said it was highly encouraged, which is to say more than mandatory. Despite having to be there for another reason, I still searched to see if there were any lighthouses nearby. There was one in the general vicinity. It was not the coolest lighthouse I’ve seen, but it would be a fine subject.
Fast forward to the weekend of, and things were not working for me. I had a hellish day of travel due to flight delays, rental car place being out of cars, having to change hotels last minute. That put me behind schedule, and I only had one opportunity to escape and go do my thing. It’s the night before, I’m exhausted, I’m checking out the weather, and there’s a storm blowing in. Weather report indicates it’ll get in too early, but I was excited to have a chance to get a good sky.
I live in the Central time zone, I had my alarm set for 5:00 AM Eastern, after a night in which I only got a few hours sleep. Despite being very tired, I didn’t want to waste a golden opportunity.
Sony Alpha 7R IV | Sony 24-70mm GM II | 24mm | ISO 100 | f/5.6 | 10 secSony Alpha 7R IV | Sony 24-70mm GM II | 24mm | ISO 100 | f/8 | 30 secSony Alpha 7R IV | Sony 24-70mm GM II | 24mm | ISO 100 | f/8 | 1/6 secSony Alpha 7R IV | Sony 24-70mm GM II | 24mm | ISO 100 | f/11 | 1/4 sec
The morning was brilliant. The colors, the clouds, the subject. I was very pleased with the results. The storm that was rolling in wasn’t but 20 minutes behind me. Definitely glad I made the trip.
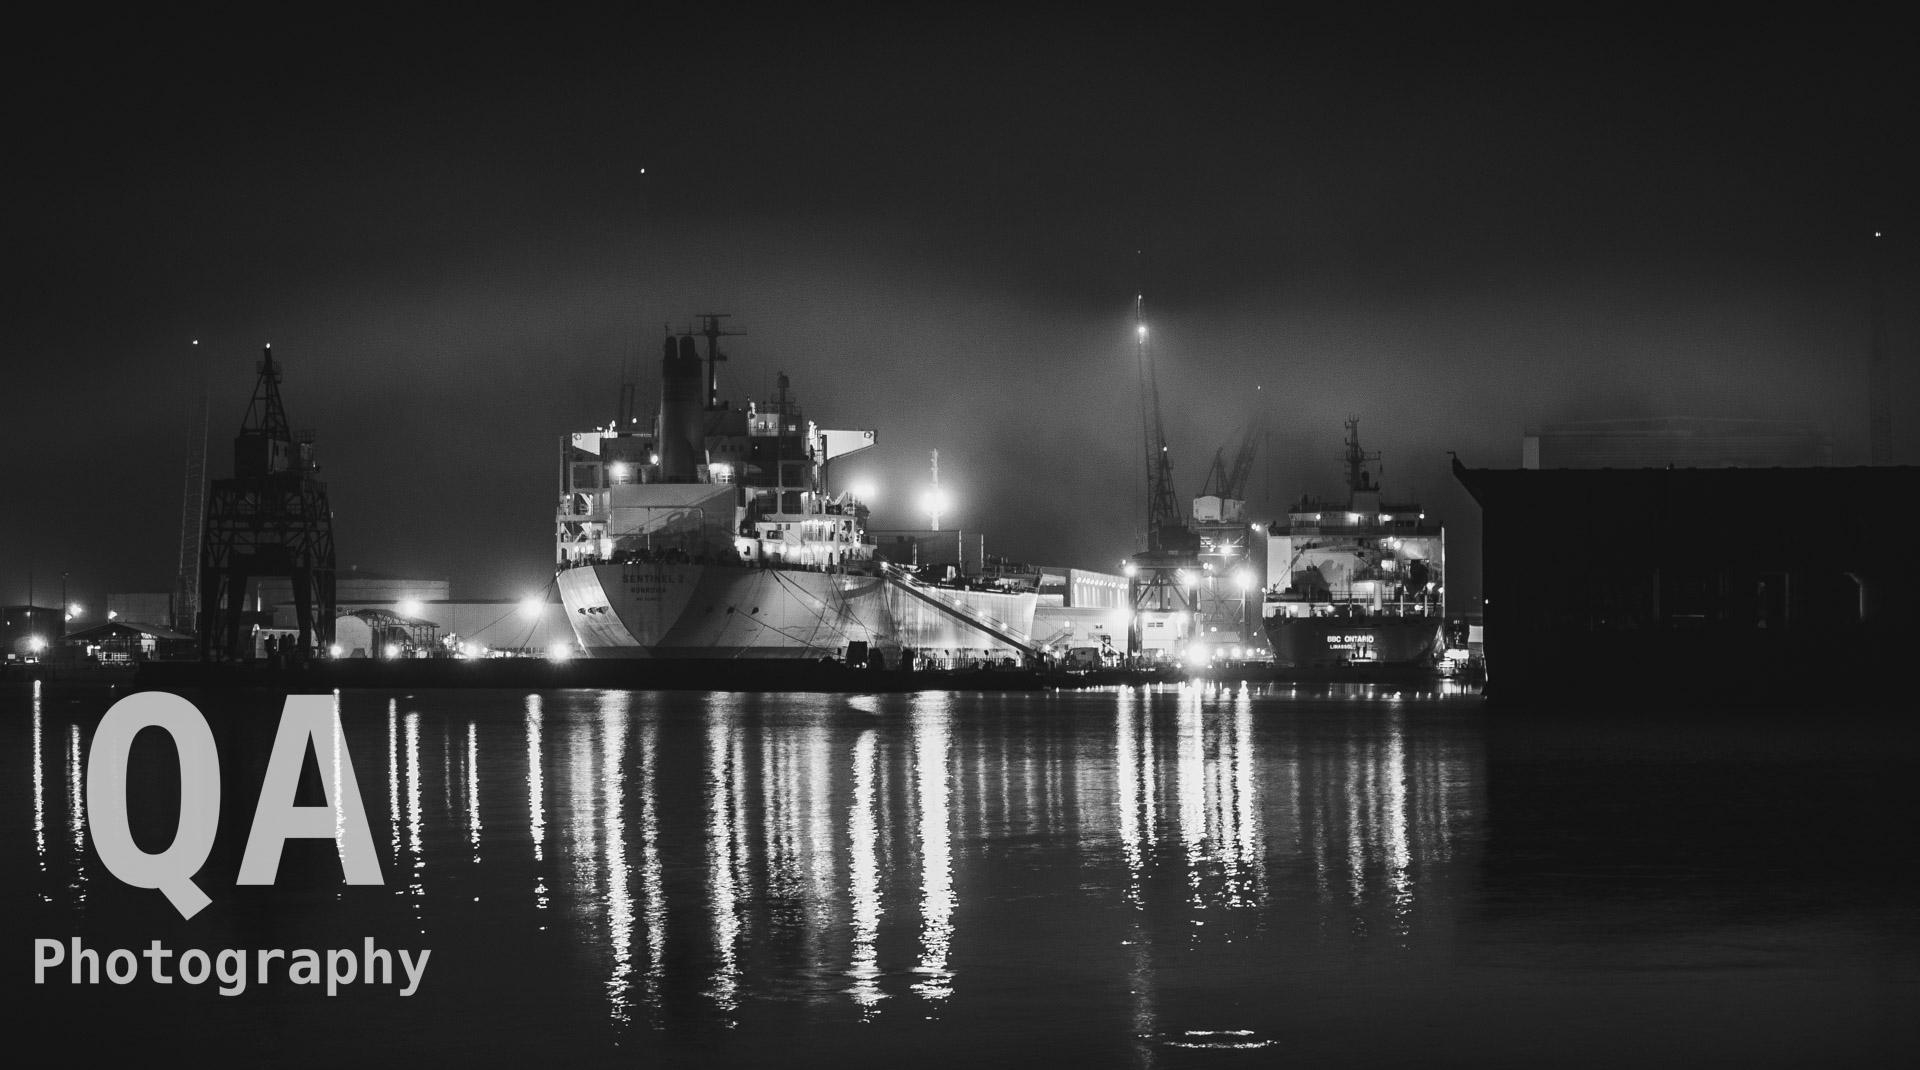
These photos were taken over a decade ago on my old Olympus 4/3rd Digital SLR. This was taken in December of 2009. The wind speed had gone down with the sun, but some fog was appearing over the land where it was cooler than over the water.
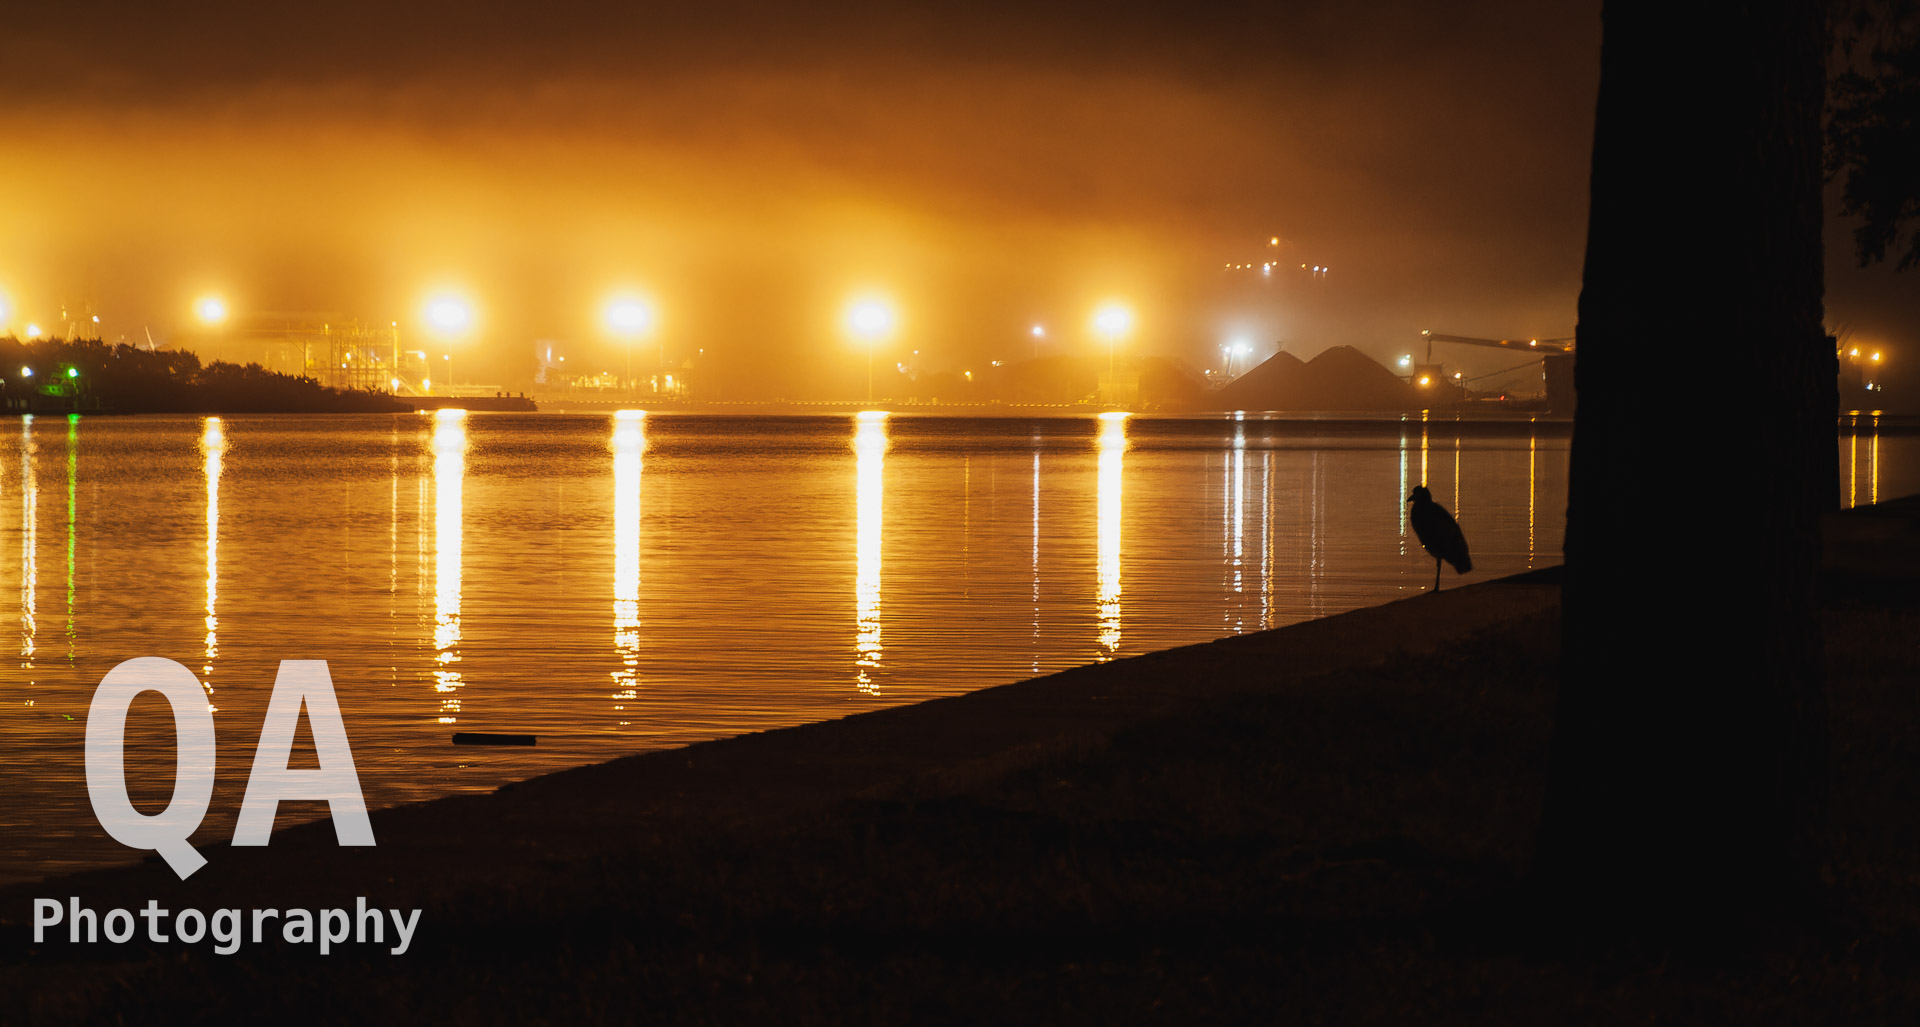
I was woken on this morning by a thunderstorm, and thought, well I’m not going to get any pictures today. I pulled up the radar, and it was a smaller storm moving through pretty quickly. Then I thought, this might actually work out for me.
In typical Houston fashion, I tried running to one of my favorite spots only to find the streets had been closed. What made that more excruciating was that on the way, I loved the view, but I lost another 10 minutes trying to work around the road closures. When the light is changing quickly, that 10 minutes feels like a lifetime.
I didn’t park where I really should have, and was rushing to avoid any problems with the place I did park. It ended up working out because the light I wanted had passed anyways, but below are three shots from this morning.
Sony A7R IV | Sony 24-70 GMII | 35mm | ISO 100 | f/11 | 3.2 secSony A7R IV | Sony 24-70mm GMII | 70mm | ISO 100 | f/11 | 1 secSony A7R IV | Sony 24-70mm GM II | ISO 100 | f/11 | 15 sec
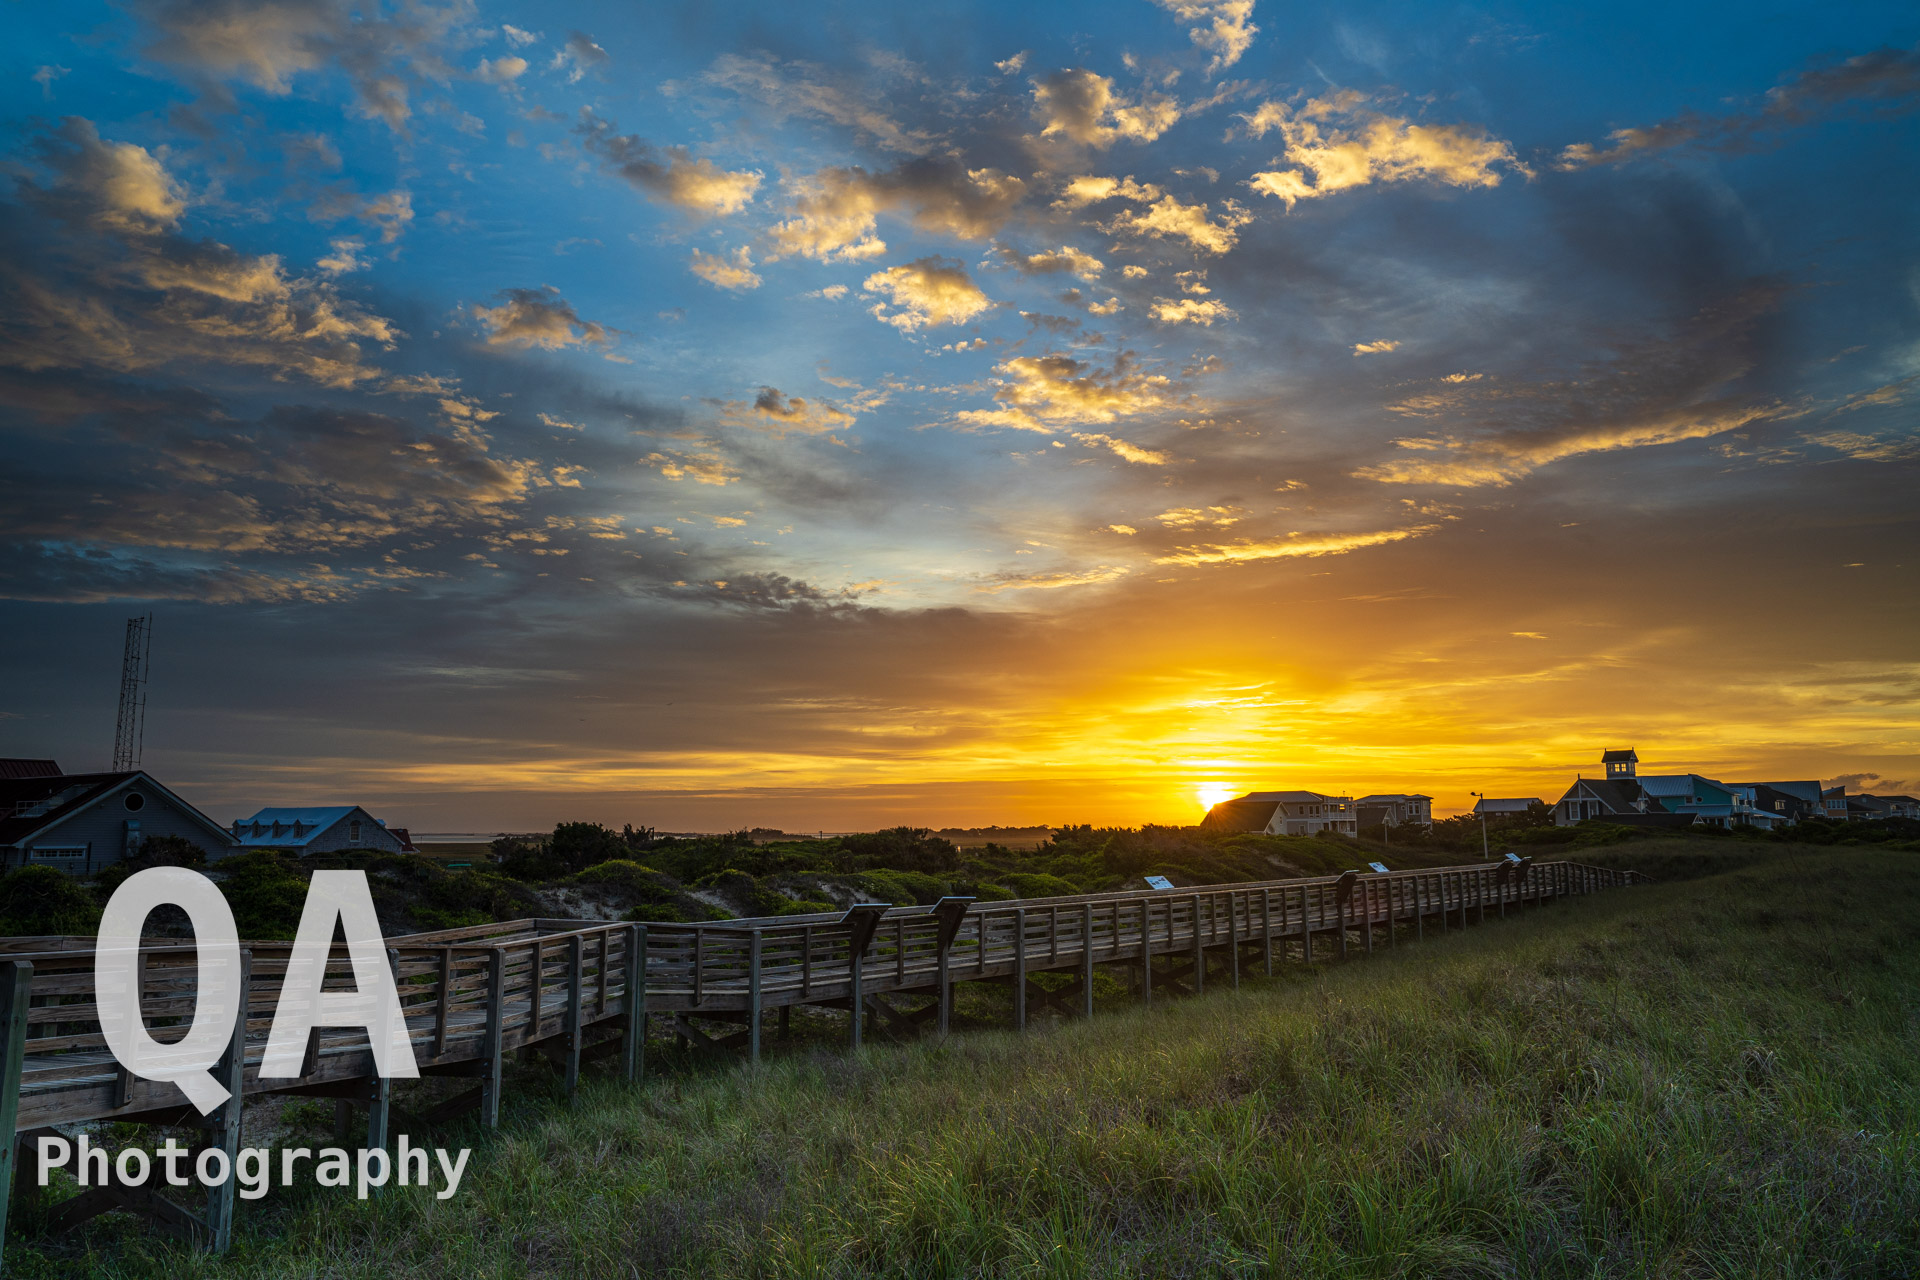
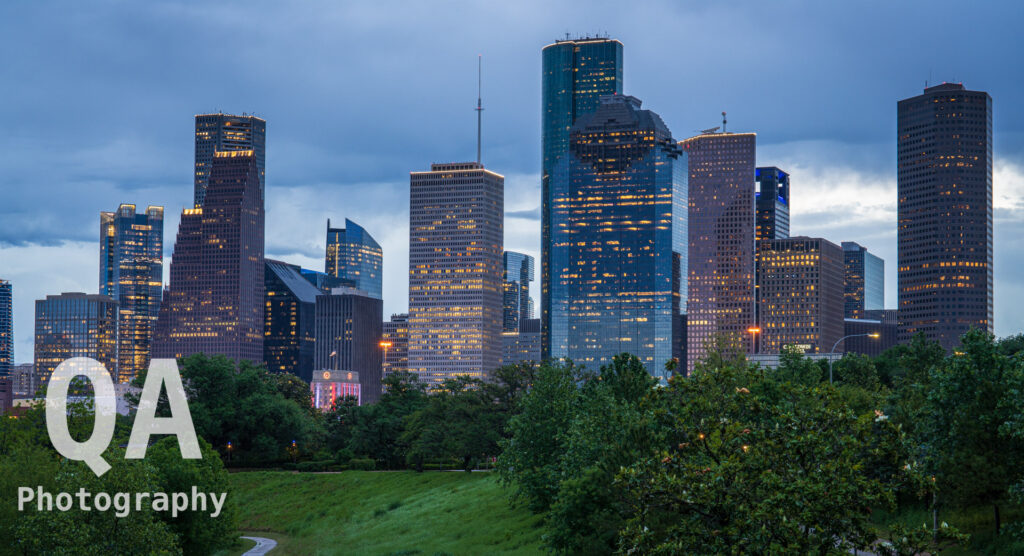
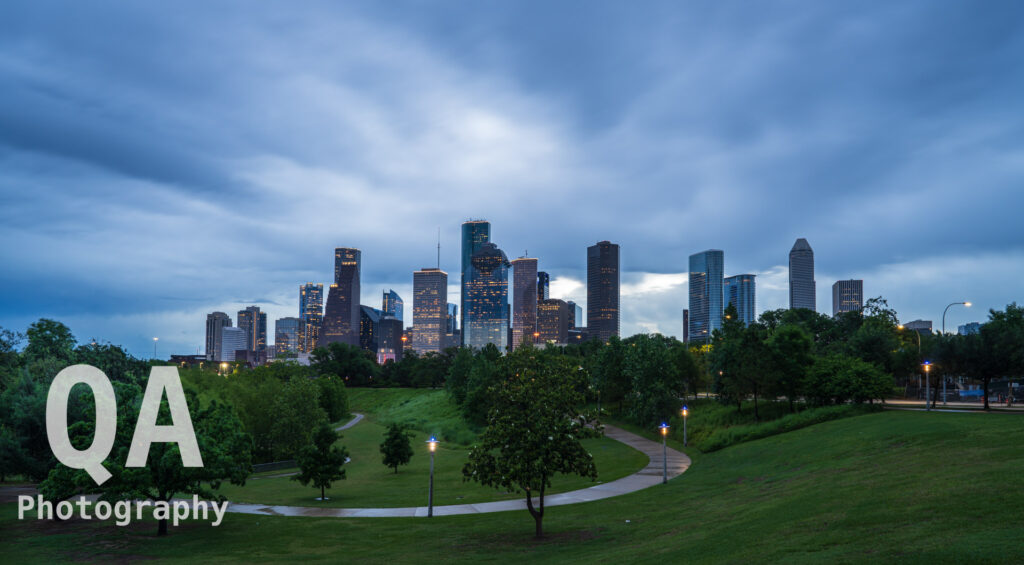
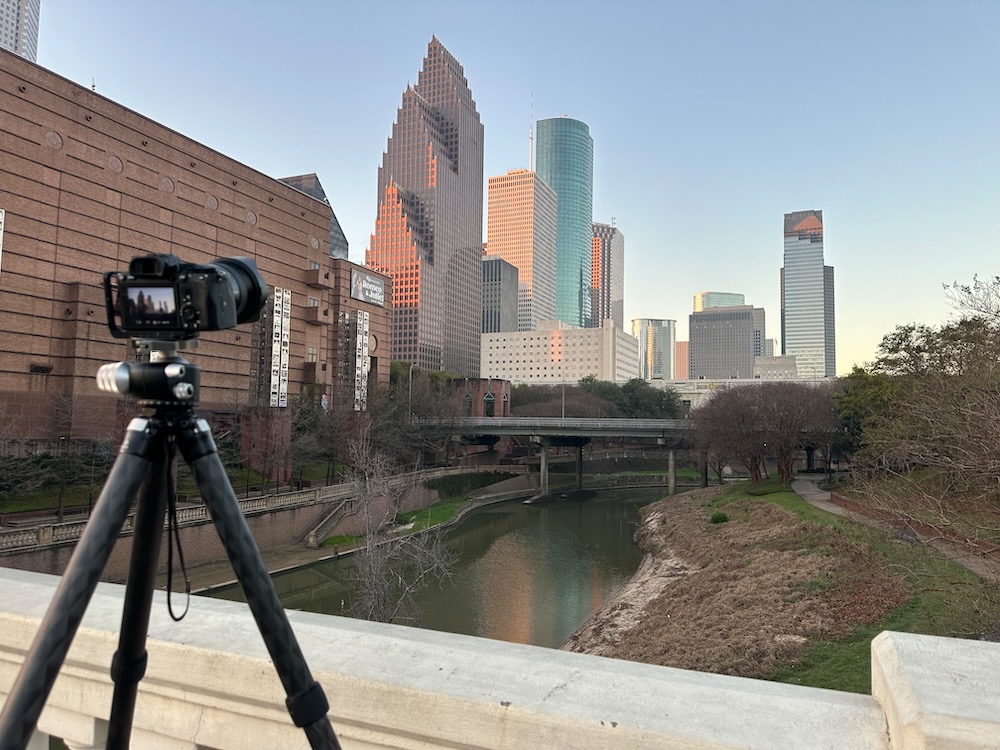
As a weekend warrior, I typically don’t let the weather dissuade me from going out. This cool January morning had scattered showers rolling through all morning. Fortunately, I was prepared, and had a great time shooting. This was my first time at this particular location, and the blue hour light and clouds with the wet streets did make for a cool, moody scene.
Sony A7R IV | Sony 24-70 GM | 25mm | ISO 100 | f/11 | 8.0 sec
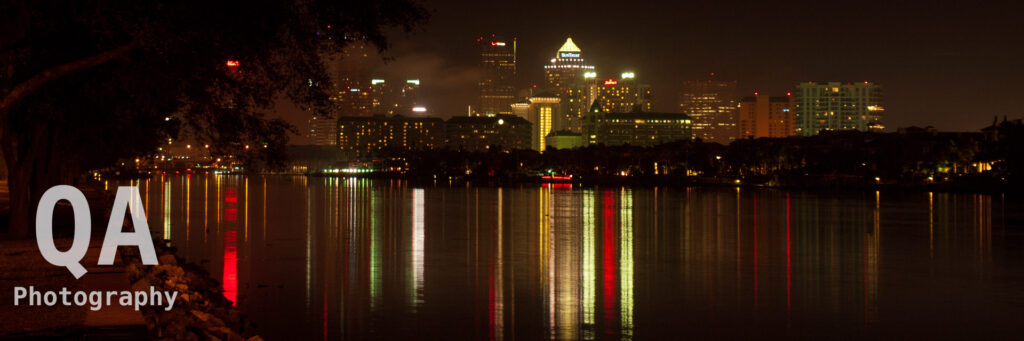
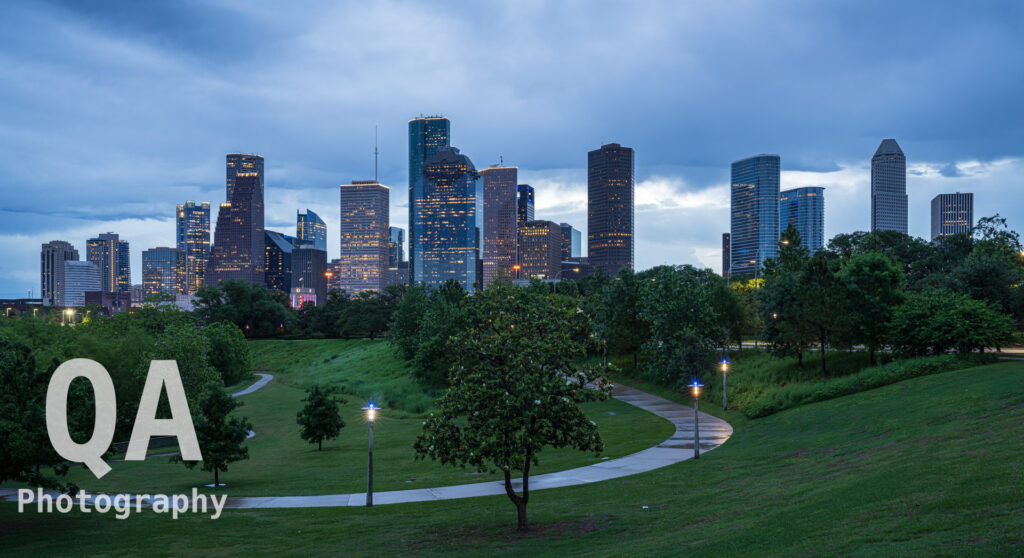
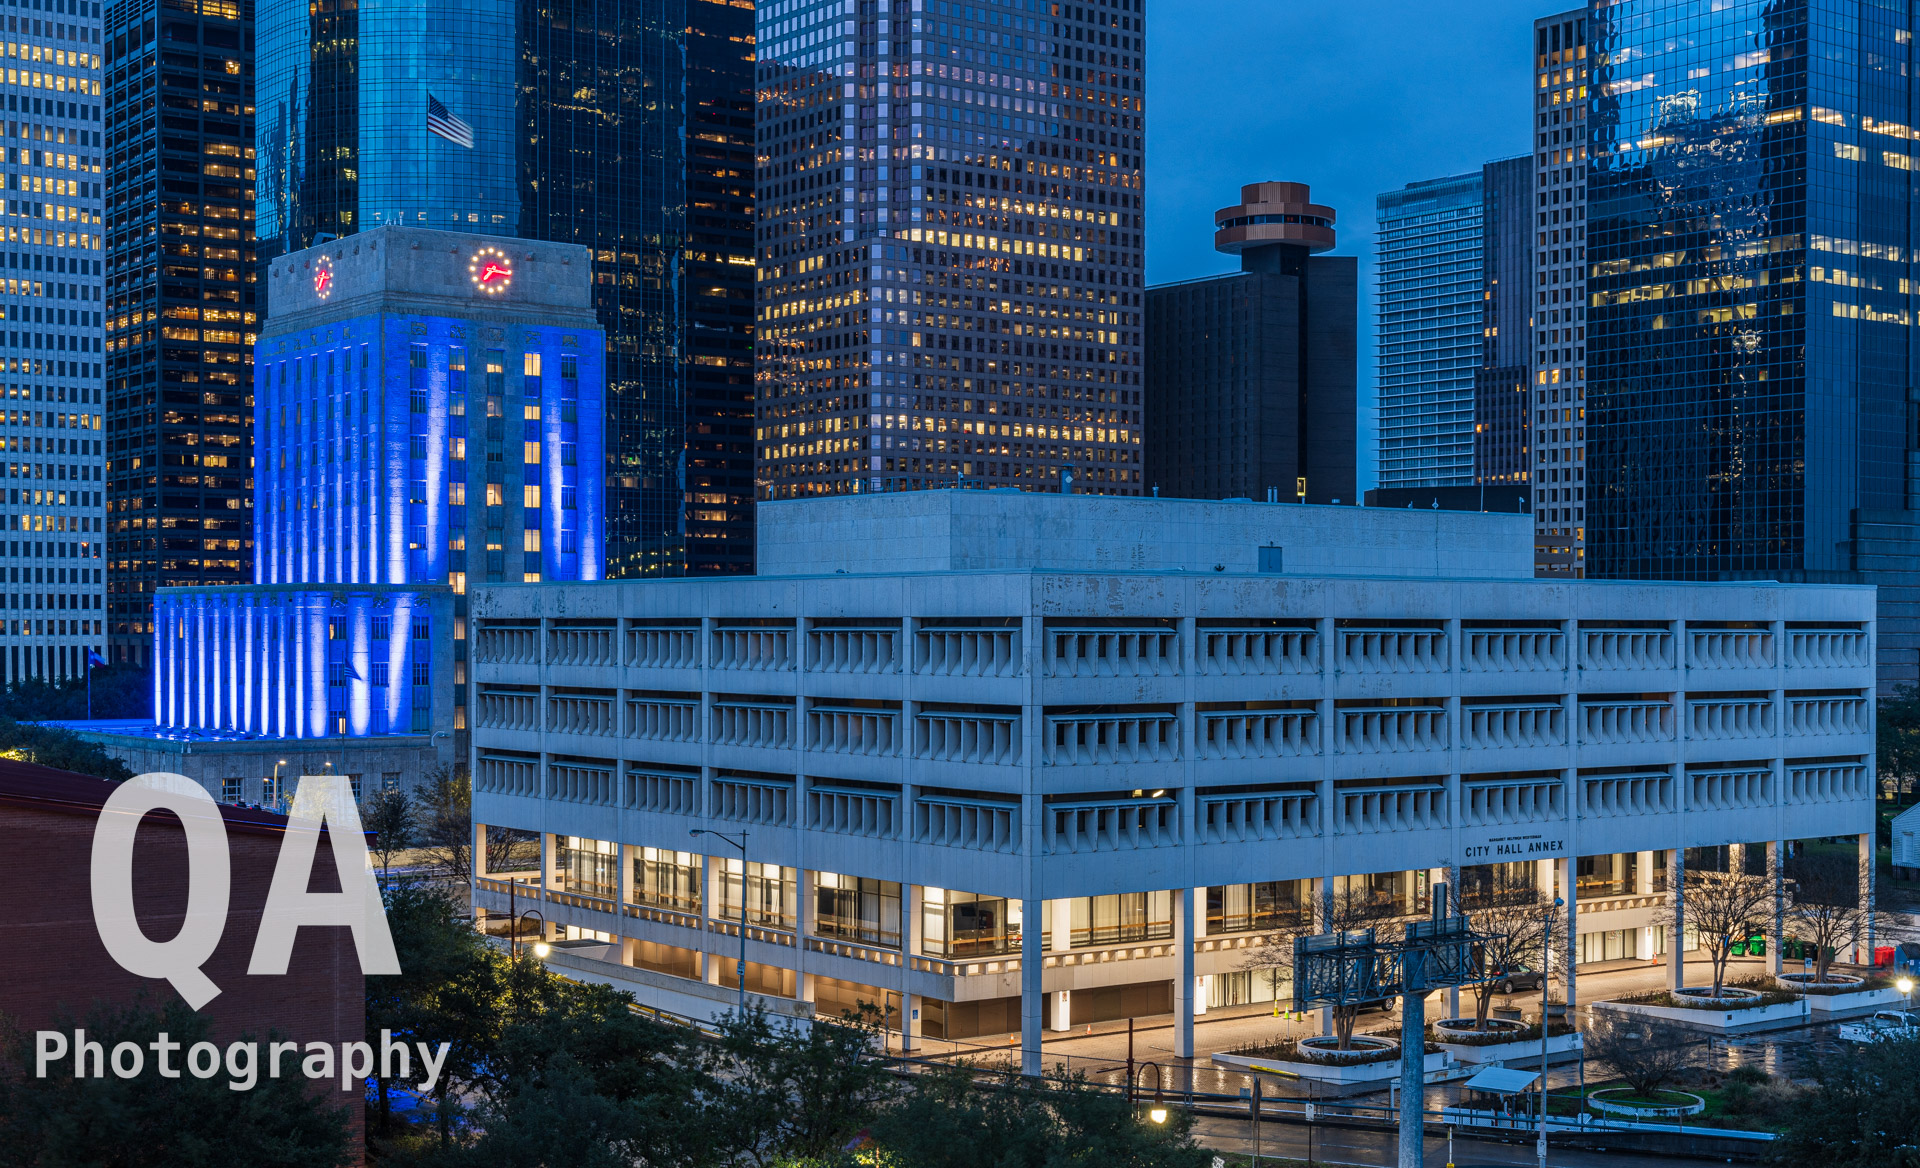
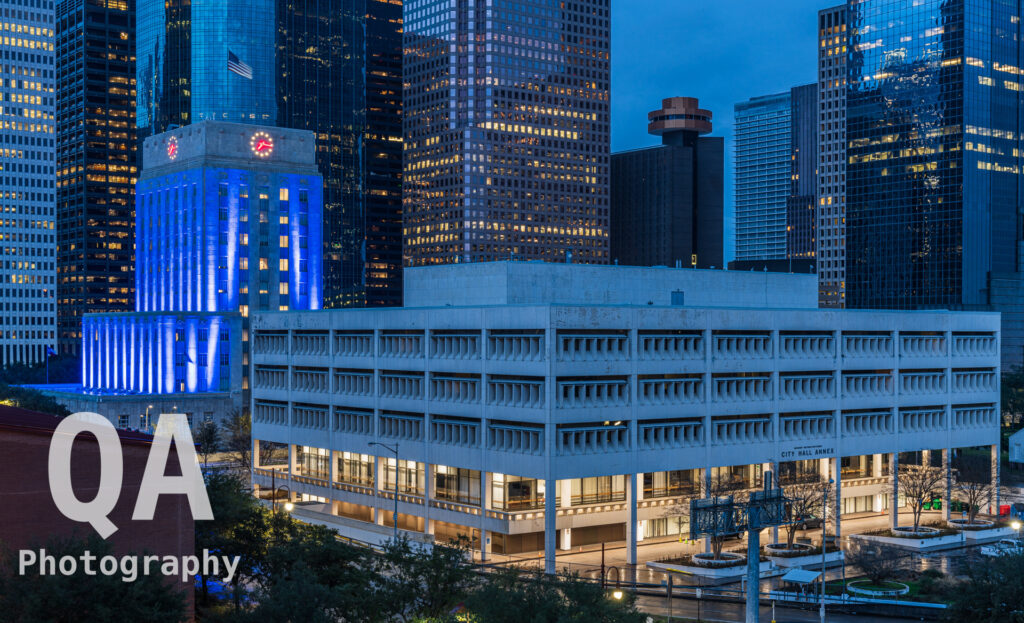
Houston has a beautiful skyline, in my opinion. I really enjoyed this view with the tall skyscrapers surrounding the city hall, which was fortunately lit in blue to match the whole scene. Below is taken from the same perspective but I zoomed in to focus on the town hall with the skyscrapers providing a backdrop.
Sony A7R IV | Sony 24-70 GM | 43mm | ISO 100 | f/11 | 3.2 sec
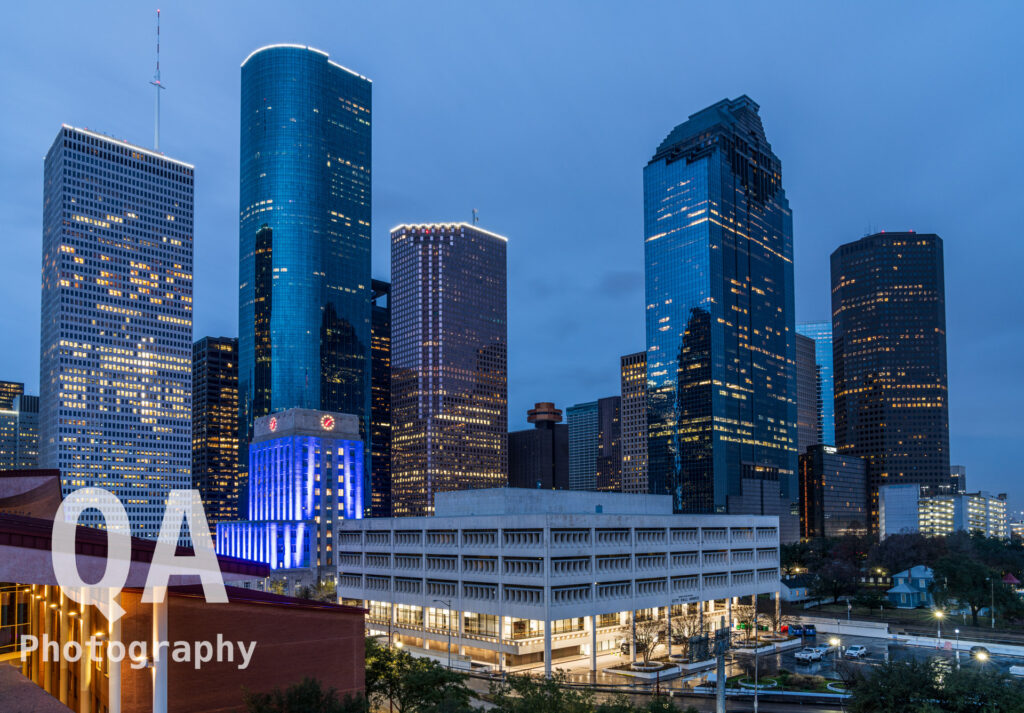
The previous photos are a bit more typical view of downtown, but I moved to get a view of the northern skyscrapers. This was not as photogenic with this perspective.
Sony A7R IV | Sony 24-70 GM | 24mm | ISO 100 | f/11 | 3.2 sec
I just received my fourth tripod and third ball head. It’s my second tripod in as many months. Finding the right setup for my use has been an adventure. Like so many before me, my tripod journey started with a cheap tripod, then lead to an upgrade, then a serious upgrade, then the best fit, hopefully.
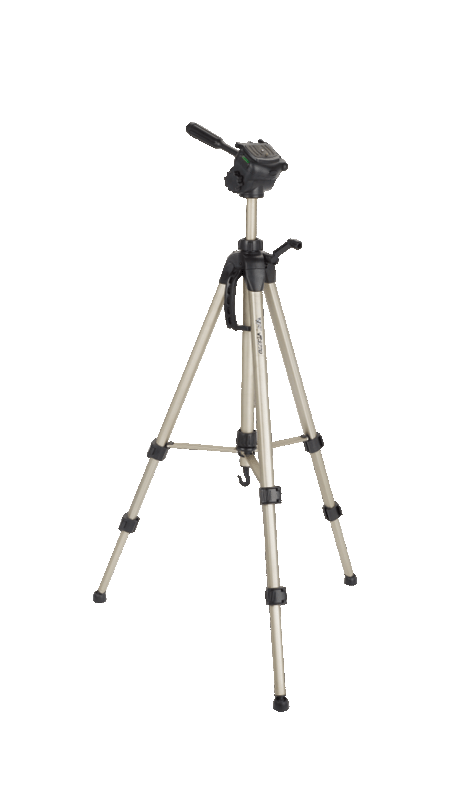
The Cheap Tripod
Cheap Tripod
The plastic and aluminum abomination you see here is what I started with. I was just starting, and to me a successful tripod was one that would hold the camera, and this tripod did that. I had issues with soft images. At first, I thought I was just struggling with focus. The whole plane of focus concept eluded me then. Turns out, in many cases, I got the focus correct, the image was just soft because of movement in the tripod. If I’m being honest, I was also using the center column which didn’t help. When I got back into photography, I knew I needed an upgrade.
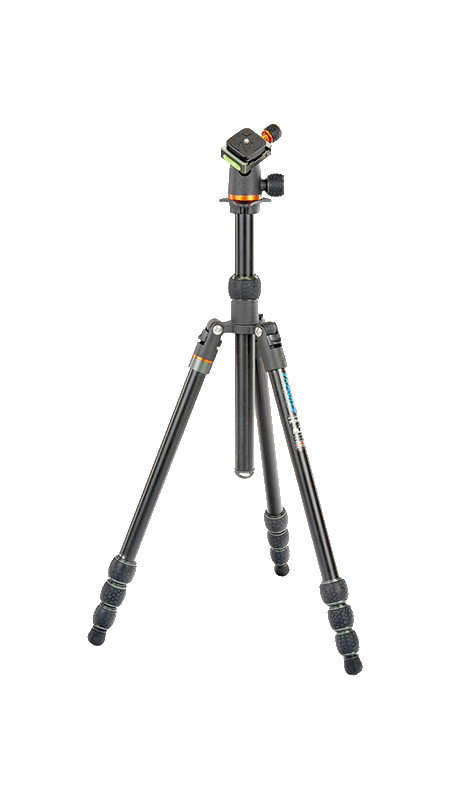
Upgrade Tripod
3 Legged Thing Travis Tripod
Enter the 3 Legged Thing Travis tripod. This was from their punks lineup, which is their entry level line. When I was looking at the specs, though, it was the strongest (greatest amount of supported weight) for the price. I read reviews online and they were favorable, so I pulled the trigger.
This was a considerable upgrade from the aforementioned abomination of a tripod. It was significantly more stable, easier to adjust, and much better made. At the time, however, I was living in a coastal Florida town, and taking it out around the weather still yielded the soft results.
Research
I then started to try to find ways to weigh it down, but I didn’t pull the trigger on anything. I then turned to the internet to try to find a solution. I considered buying a new tripod, too. I started checking reviews for which tripod I should get. This is where the frustrations started mounting. All of the reviews I read and/or watched were just opinions, no one had anything concrete to contribute. I found most reviews favored brands, not specific products and that drove me crazy, too.
I then found Photography Online on YouTube. I just happened to stumble across a video where they were showing people how to use a tripod. I know that sounds trivial, but it was brilliant. This video is the first one I saw. In it, Marcus speaks about the sturdiness of the tripod and testing the sturdiness by putting your fingers on the camera and trying to wiggle it. I did this test on my Travis and even on solid ground there was way more movement then I would have like. They also have this video that you would enjoy when considering a tripod.
Serious Upgrade Tripod
I thoroughly enjoyed Photography Online so much I then began to watch their entire library on YouTube, and in many episodes Marcus touts how the Kingjoy Tripod is the best he’s ever used. He also specifically cites the expensive Gitzo’s he’s had that have broken. I tried to find the tripod state side, but was unable to, so I purchased through their online store.
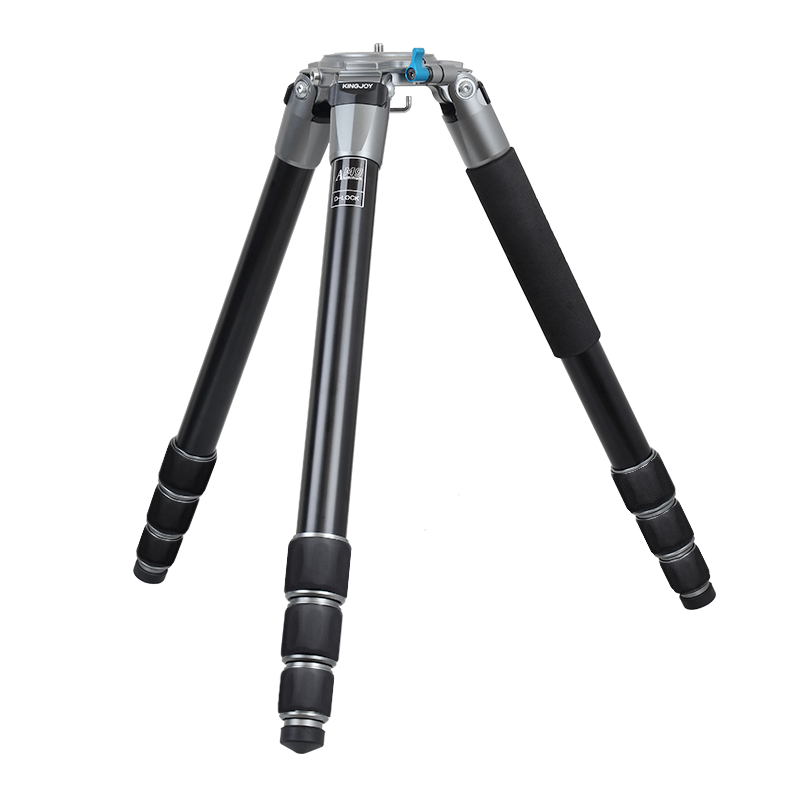
Kingjoy A86
The first thing I did when it came in was set it up and try the two finger test. I know this isn’t definitive, but it was infinitely better than the 3 Legged Thing Travis. I felt complete, I had my serious carbon fiber tripod and it was sturdy. It also came with the tripod feet spikes. I took it out in the weather, and it was great.
Ball Heads
A new problem presented itself when I got my 100-400mm lens. At 400mm, even with everything tightened, I could see quite a bit of movement when interacting with the camera. I had the realization that my ball head was now the weakest link. Once again, the maddening and time-wasting research began. Things did not look good for my wallet when I found this website. The Center Column was everything I wanted. Their about us page spoke to me. David has applied a very scientific approach to the measurement and rating of tripods. Unfortunately, his last post was in 2021. Fortunately, he had completed a good number of reviews during the 3 years this was active.
I had seriously been considering the 3 Legged Thing Airhed, but after seeing the reviews on the center column, I realized 3 Legged Thing really didn’t make great products. In reviewing the results, it became apparent that the size of the ball had a direct impact on the sturdiness of the head.
Really Right Stuff was what I wanted. American company, American made, quality hardware. I thought about the BH-40, but they say for 400mm and greater, go 55. At this point, I was tired of purchasing and repurchasing equipment, so I was going to go big and be done. I was worried that I wouldn’t be able to move the camera into portrait orientation, so I also needed a bracket.
Really Right Stuff talks about their arca-compatible standard, so I didn’t want any L-bracket, I wanted one that would fit nicely in the clamp style lock and keep the camera in place.
Best Fit Tripod
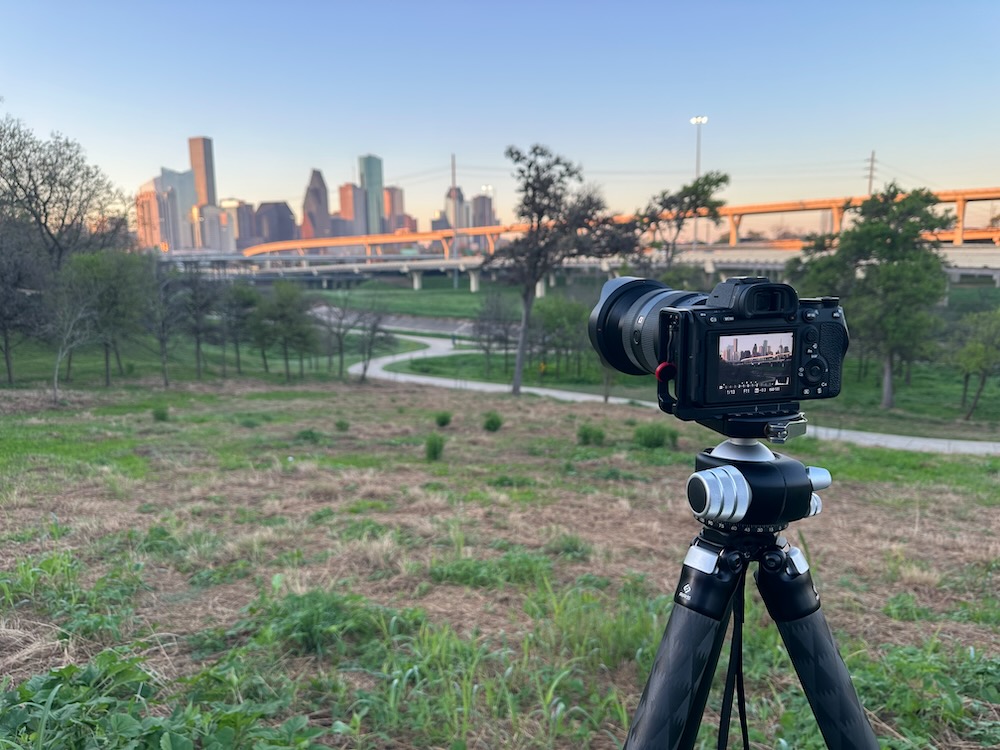
The only downside to my Kingjoy is the size. It’s fine for when I’m home and around town, but if I’m traveling, especially if I’m flying, I would not be able to take it with me. I really liked Really Right Stuff’s Ultralight line. With the fixed apex, it was much tighter fit. I wanted the three series to handle my gear, and fortunately, the TFC-34 mkII had a collapsed length of under 20” Not small, but manageable.
I have a few trips coming up, the tripod was out of stock on RRS’ site, but B&H had it, I decided to bite the bullet and buy it all now.
I took the new setup out this past weekend for a test run, and it was brilliant. The smaller tripod was much easier to wield around, it felt great, I had much less movement with my telephoto on. I am obligated to say, in regards to the RRS BH-55, it is built like a tank. Since that requirement is now satisfied, I’ll just add that the attention to detail, the feel, the movements, every aspect of this equipment is the best I’ve experienced.
I have been working with technology since before gigabit networks were standard. I remembered transferring files just to see how fast they would go. Today, with Thunderbolt, and 10 Gbps or 20 Gbps USB gigabit ethernet seems so slow. I’ve been holding off on upgrades because the cost versus benefit didn’t seem worth it to me.
Recently, I setup my custom rig, which has built-in 2.5 GE, and connected It to my modem that has a 5 GE port, and there was an improvement to speeds and responsiveness. Regrettably, I didn’t benchmark it, so I don’t have tangible figures to share.
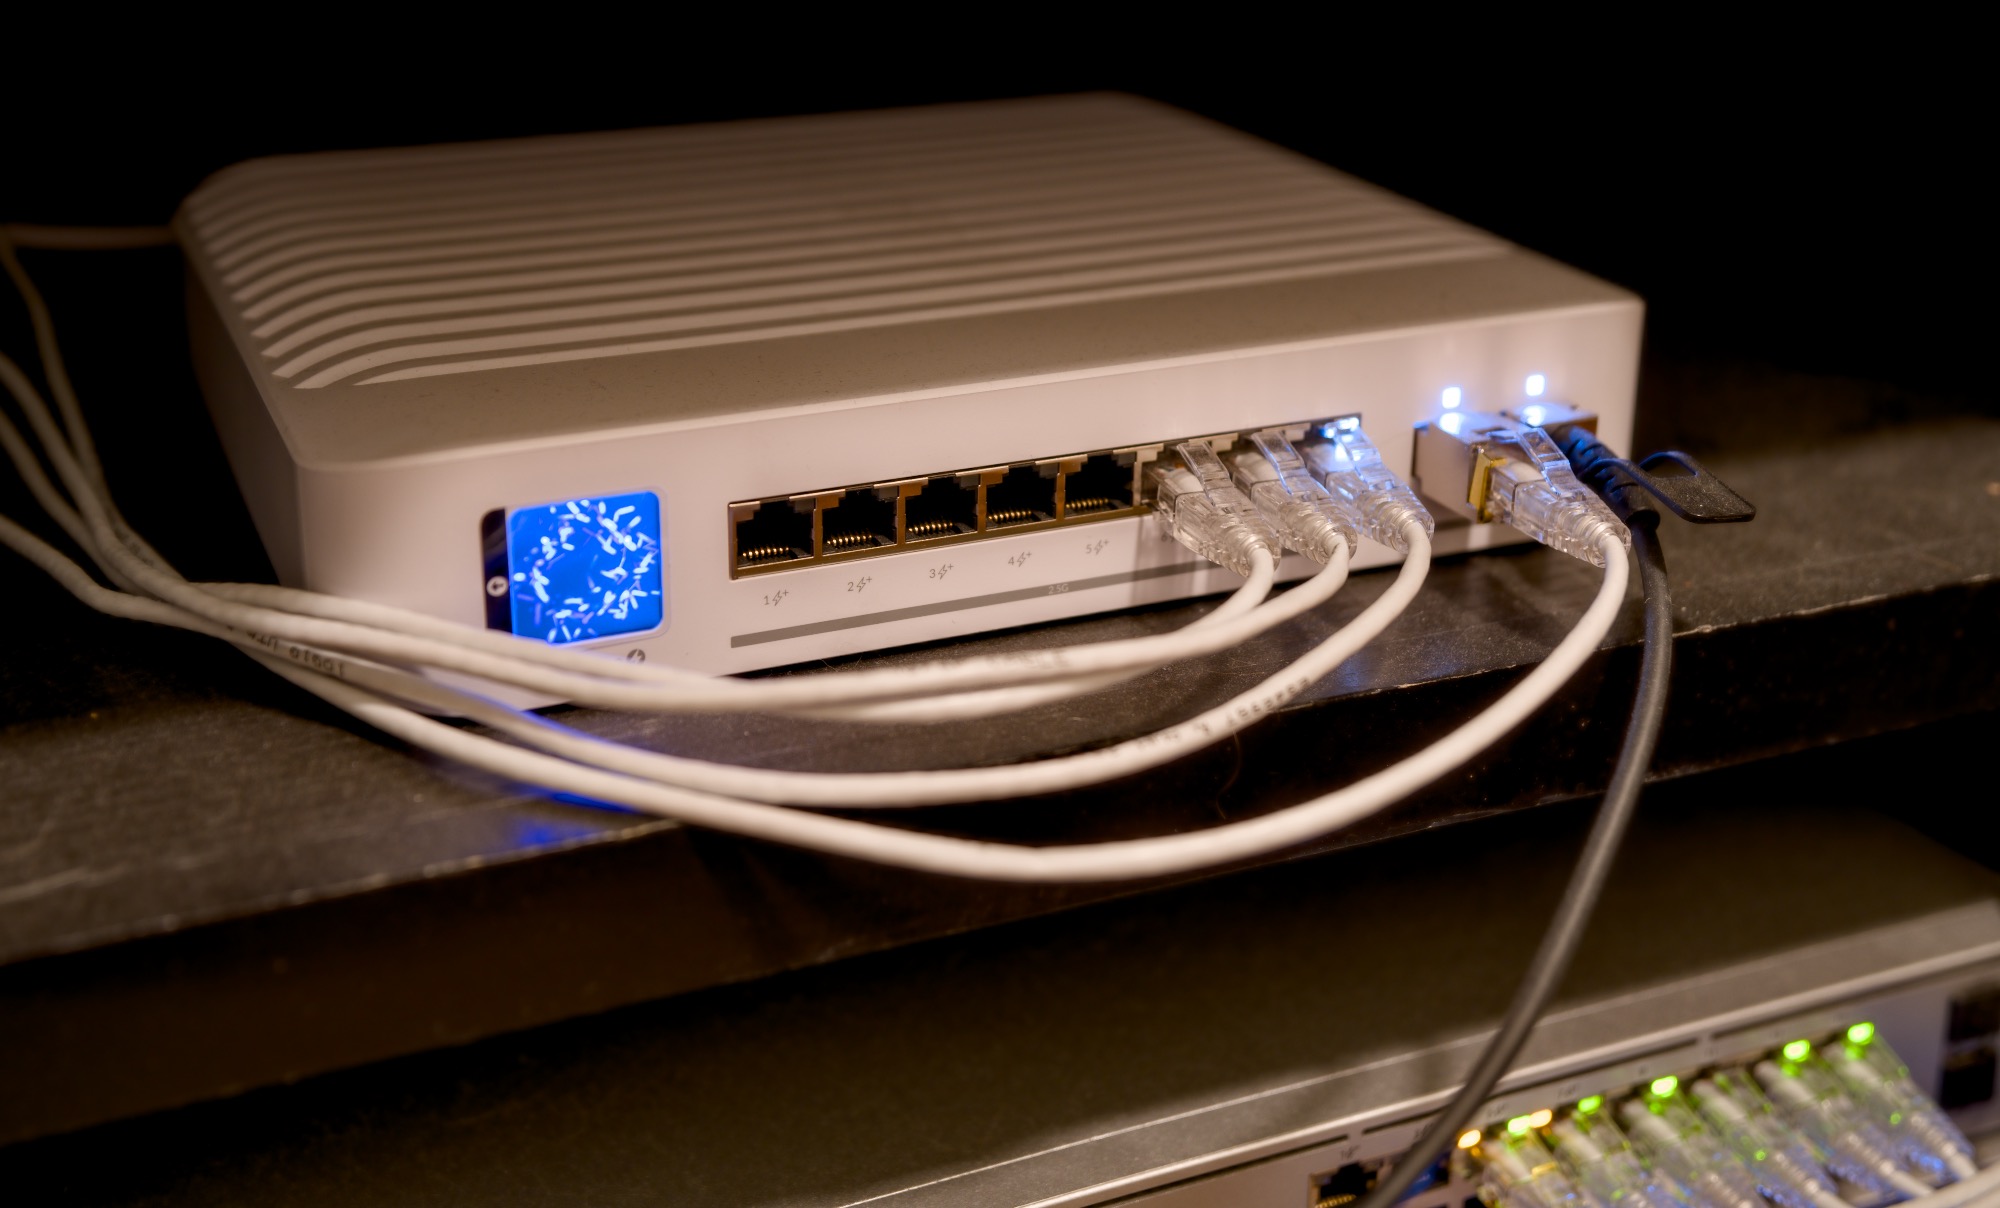
At this point, I already had a Ubiquiti U6 Enterprise AP, and I was dying to see how upgrading that to a 2.5 GE would improve my experience. I upgraded my firewall, my NAS, and added the 8 port enterprise switch.
I am a bit annoyed at the moment. The new switch is no longer providing PoE. My WAP is back on GE PoE. Switching is otherwise functioning as expected. My new NAS is connected via 10GbE, and I have been transferring files to a from and very pleased with the faster speeds.
I have started the RMA process with Ubiquiti, and will make a new post when that process is complete, and will run some benchmarks on speeds when uplink via GE versus 2.5 GE.
Edit: Ubiquiti did respond to my RMA request next day, and approved it. Unfortunately, there isn’t an advanced replacement option that I can see, so I’ll be shipping it off.